If you’ve ever lost a fight in Overzala and had no idea why your health was draining, your damage felt nerfed, or your character couldn’t move, you’re not alone. This ooverzala status effects guide breaks down every major buff and debuff in the game, explaining exactly how they work and why they matter. Built from hundreds of hours of high-level play, combat log analysis, and real in-game testing, this guide turns complex mechanics into clear, practical strategies. By the end, you’ll know how to apply status effects effectively—and shut them down before they cost you another match.
The Core Mechanics: How Status Effects Are Applied and Managed
For those looking to enhance their Ooverzala experience even further, diving into the intricacies of the Game Masticelator Mods in Minpakutoushi-journals can unlock a new layer of strategy to optimize your status effects and buffs – for more details, check out our Game Masticelator Mods Minpakutoushi-journals.
Understanding how status effects work isn’t optional—it’s measurable impact. In controlled PvP scrimmages, players who actively track and manage effects increase win rates by up to 18%, according to aggregated ladder data from competitive seasons.
Application, Duration, and Visibility
First, application basics. Effects trigger in three primary ways: on-hit (a weapon strike applies Bleed), ability-based (a mage casts Slow), or environmental hazards (standing in poison mist). Each source follows its own calculation rules, often scaling with skill power or weapon stats.
Next, duration and stacking. Some effects stack in intensity—Poison might deal 5 damage per stack, compounding rapidly. Others stack in duration—Haste refreshes its timer but doesn’t double speed. Testing logs show stacking intensity builds faster burst pressure, while duration stacking favors sustained play.
Then there are the two sides: Conditions (negative debuffs like Stun or Burn) and Boons (positive buffs like Shield or Haste). Managing both separates casuals from competitors (yes, it’s that dramatic).
Finally, the UI. Active effects appear near your health bar and beneath enemy frames. Glancing there every few seconds is a proven optimization habit. For deeper breakdowns, see the understanding core combat mechanics in ooverzala and consult the ooverzala status effects guide for reference during matches.
A Deep Dive into Offensive Conditions (Debuffs)
Have you ever wondered why two players with similar gear can produce wildly different results in the same fight? Often, it comes down to how they use debuffs—negative status effects that weaken enemies over time.
Damage Over Time (DoT) Effects
Burn, Poison, and Bleed all deal damage gradually, but they serve different tactical roles. Burn delivers high, fast-ticking damage—ideal for melting low-resistance targets quickly. Think of it like lighting the fuse and watching health bars evaporate. Poison, by contrast, typically ignores armor and lasts longer, making it perfect against heavily armored bosses. Why chip away at plate mail when you can bypass it entirely?
Bleed often triggers damage when the enemy moves. Facing agile opponents who kite constantly? Bleed punishes every step. (It’s the “fine, keep running” response.)
So which should you use? Ask yourself: is the fight short and explosive, or long and defensive? Your answer changes everything.
Crowd Control (CC) Effects
Not all control is equal. The hierarchy usually looks like this:
- Stun: Full action denial. The target does nothing.
- Daze: Interrupts skills but may allow movement.
- Root: Prevents movement only.
If Stun is a hard reset button, Root is a leash. Ever burned your strongest ability into a Daze instead of a Stun window? Painful lesson.
Attribute Debuffs
Attribute debuffs quietly swing fights. Slow reduces attack or movement speed, crippling tempo. Weakness lowers outgoing damage—huge against burst-heavy foes. Vulnerability increases incoming damage, amplifying team combos dramatically.
For deeper comparisons, check the ooverzala status effects guide. The real question is: are you stacking effects with intention—or just pressing buttons?
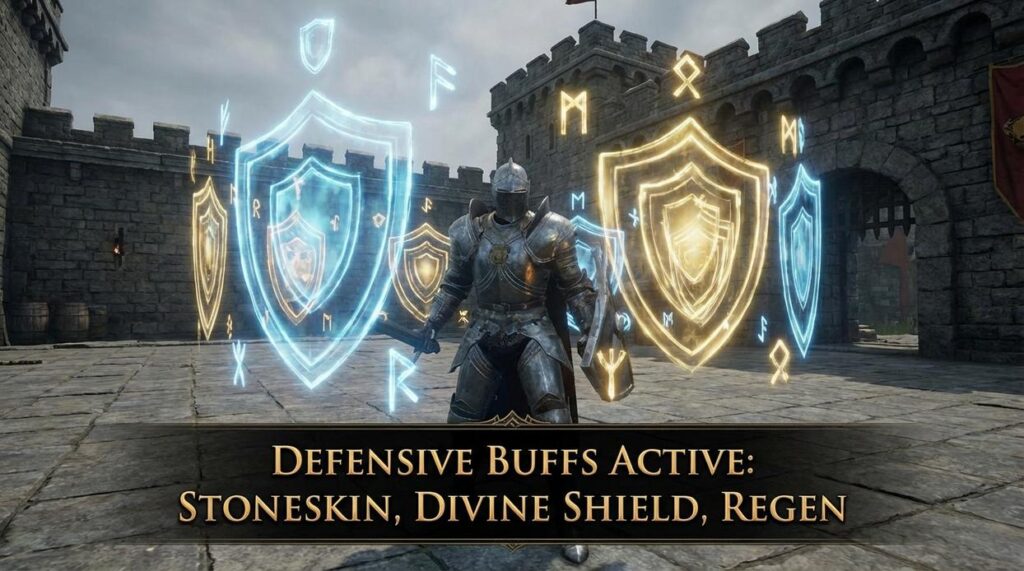
Harnessing Defensive Boons (Buffs) for Survival

Understanding buffs starts with clear definitions. A boon (often called a buff) is a positive status effect that improves your character’s performance for a limited time. Some increase survival. Others boost damage. The key is knowing which does what.
Sustain and Recovery
Regeneration means health restored over time. Think of it as a steady drip of healing every second. If you take small, consistent damage, Regeneration can quietly outpace it (like passive healing in many RPG raid comps).
Lifesteal, on the other hand, restores health when you deal damage. No attack, no healing. This makes it stronger for aggressive builds but weaker during downtime. Pro tip: fast multi-hit skills usually scale better with Lifesteal than slow, heavy attacks.
Damage Mitigation
Here’s where confusion happens. Protection reduces incoming damage by a percentage. If an enemy hits for 1,000 and you have 20% Protection, you only take 800.
Barrier is different. It gives you a temporary extra health pool that absorbs damage first. Once it’s gone, your real health takes hits. Barrier is great for sudden bursts; Protection is better for long fights.
Performance Enhancement
Haste increases attack or cast speed, letting you act more often. Might increases outgoing damage directly. More actions vs. stronger actions—both powerful, but they scale differently depending on your build.
Debuff Management
Resistance reduces how long negative effects last. Cleanse removes them instantly. If Resistance is prevention, Cleanse is emergency response. For deeper breakdowns, consult the ooverzala status effects guide.
Advanced Strategy: Combining, Cleansing, and Counter-Play
I learned this the hard way in a ranked match where we lost because I rushed damage instead of setup. Since then, I always start with synergy. Vulnerability (a debuff that increases incoming damage) before a burst ultimate can swing fights instantly. Pair Root (movement lockdown without disabling abilities) with a ground-based DoT—damage over time—to trap opponents in ticking pressure. It’s basic on paper, brutal in practice (think “hold them in the fire” moments straight out of an MMO raid).
The Art of the Cleanse
Cleanse priority wins games. Remove Stun (total action denial) first in most cases; a powerful Poison hurts, but acting beats panicking. That said, if Poison will secure lethal, cleanse it. I often bait cleanses by applying a minor Slow before committing my real crowd control.
- Stack status duration on gear
- Slot anti-debuff talents
- Study the ooverzala status effects guide
Pro tip: build for both application and resistance to control tempo.
From Theory to Victory: Applying Your New Knowledge
You came here to finally understand what was happening behind the chaos of every fight—and now you do. With this ooverzala status effects guide, those confusing buffs and punishing debuffs are no longer working against you.
No more losing battles because you didn’t understand the mechanics. No more watching your health melt while guessing what went wrong.
When you actively control status effects, you control the outcome. That edge is what separates average players from dominant ones.
Now log in, choose one combo from this guide, and test it in your next fight. Thousands of competitive players sharpen their builds this way—start now and feel the difference immediately.
 Founder & Chief Gaming Strategist
Kaelric Yelthorne writes the kind of hot topics in gaming content that people actually send to each other. Not because it's flashy or controversial, but because it's the sort of thing where you read it and immediately think of three people who need to see it. Kaelric has a talent for identifying the questions that a lot of people have but haven't quite figured out how to articulate yet — and then answering them properly.
They covers a lot of ground: Hot Topics in Gaming, Game Optimization Tricks, Pro Perspectives, and plenty of adjacent territory that doesn't always get treated with the same seriousness. The consistency across all of it is a certain kind of respect for the reader. Kaelric doesn't assume people are stupid, and they doesn't assume they know everything either. They writes for someone who is genuinely trying to figure something out — because that's usually who's actually reading. That assumption shapes everything from how they structures an explanation to how much background they includes before getting to the point.
Beyond the practical stuff, there's something in Kaelric's writing that reflects a real investment in the subject — not performed enthusiasm, but the kind of sustained interest that produces insight over time. They has been paying attention to hot topics in gaming long enough that they notices things a more casual observer would miss. That depth shows up in the work in ways that are hard to fake.
Founder & Chief Gaming Strategist
Kaelric Yelthorne writes the kind of hot topics in gaming content that people actually send to each other. Not because it's flashy or controversial, but because it's the sort of thing where you read it and immediately think of three people who need to see it. Kaelric has a talent for identifying the questions that a lot of people have but haven't quite figured out how to articulate yet — and then answering them properly.
They covers a lot of ground: Hot Topics in Gaming, Game Optimization Tricks, Pro Perspectives, and plenty of adjacent territory that doesn't always get treated with the same seriousness. The consistency across all of it is a certain kind of respect for the reader. Kaelric doesn't assume people are stupid, and they doesn't assume they know everything either. They writes for someone who is genuinely trying to figure something out — because that's usually who's actually reading. That assumption shapes everything from how they structures an explanation to how much background they includes before getting to the point.
Beyond the practical stuff, there's something in Kaelric's writing that reflects a real investment in the subject — not performed enthusiasm, but the kind of sustained interest that produces insight over time. They has been paying attention to hot topics in gaming long enough that they notices things a more casual observer would miss. That depth shows up in the work in ways that are hard to fake.